Showing posts with label Crafts. Show all posts

Tuesday, November 1, 2011

Pinterest in November

I know that the majority, if not all of you, are on pinterest.  What an amazing, addictive and most rewarding website..I LOVE IT! (if you aren't, i'll send you an invite)

What do I love about it?  Besides the millions of recipes (with photos), the clothing ideas, the home ideas, holiday decor?  ...the list goes on!

With that said, I will have to say that now that it is the MONTH OF NOVEMBER, what are you going do about it? 

I am turning to Pinterest to get us started on Thanksgiving..we'll eventually work our way to Christmas, eventually.

For this week, plan a craft.  Any craft will do, but here are a few:
1.)  Wooden peg people.  I got the idea from HERE
Pinned Image
But you can do so many MORE than just these (but these are SO cute for Thanksgiving!) Check out this website for other ideas/months, whatever. 
Can you imagine the fun your kids would have with these?  Or as decoration in your home?  Fun!

2.) This is more of a Christmas one, but I think it is appropriate for this time of year, don't you?  Find it here.
Pinned Image
It's will cost a bit of money, but you could even print some of the ideas off on your own printer.

3.)  This next one would be super, SUPER easy and VERY low cost, depending on what you have in your home.  The woman who did this said she bought her charger for really cheap at Walmart, so keep your eyes open...and she used her cricut to cut out the vinyl.  I am sure there are other ways to do it, so do what you can with WHAT you have!
Pinned Image
Next week, lots and lots of Thanksgiving food ideas!

Wednesday, July 13, 2011

Wednesday, June 15, 2011

knot necklace

Knot Necklace

One of the cutest yet simplest crafts I've ever done. Supplies Needed: Remnant fabric (any kind that isn't too stiff), craft balls (I used 3/4 inch) pins, and sewing machine. Optional: dowel and Velcro


First, cut a strip of fabric 4-5 inches wide (depending on the size balls you want to use). My fabric was 45 inches long. It created a finished product that used 11 craft balls, 12 knots, and was 24 inches long.


After cutting the fabric, pin wrong sides together (the full length of the fabric), and sew down the length of the fabric.


Tip: After sewing the fabric. I sewed one end shut (It just looks better-it doesn't serve a purpose).


Next, turn the fabric right side out. I used a 45 inch long dowel to push the fabric through.


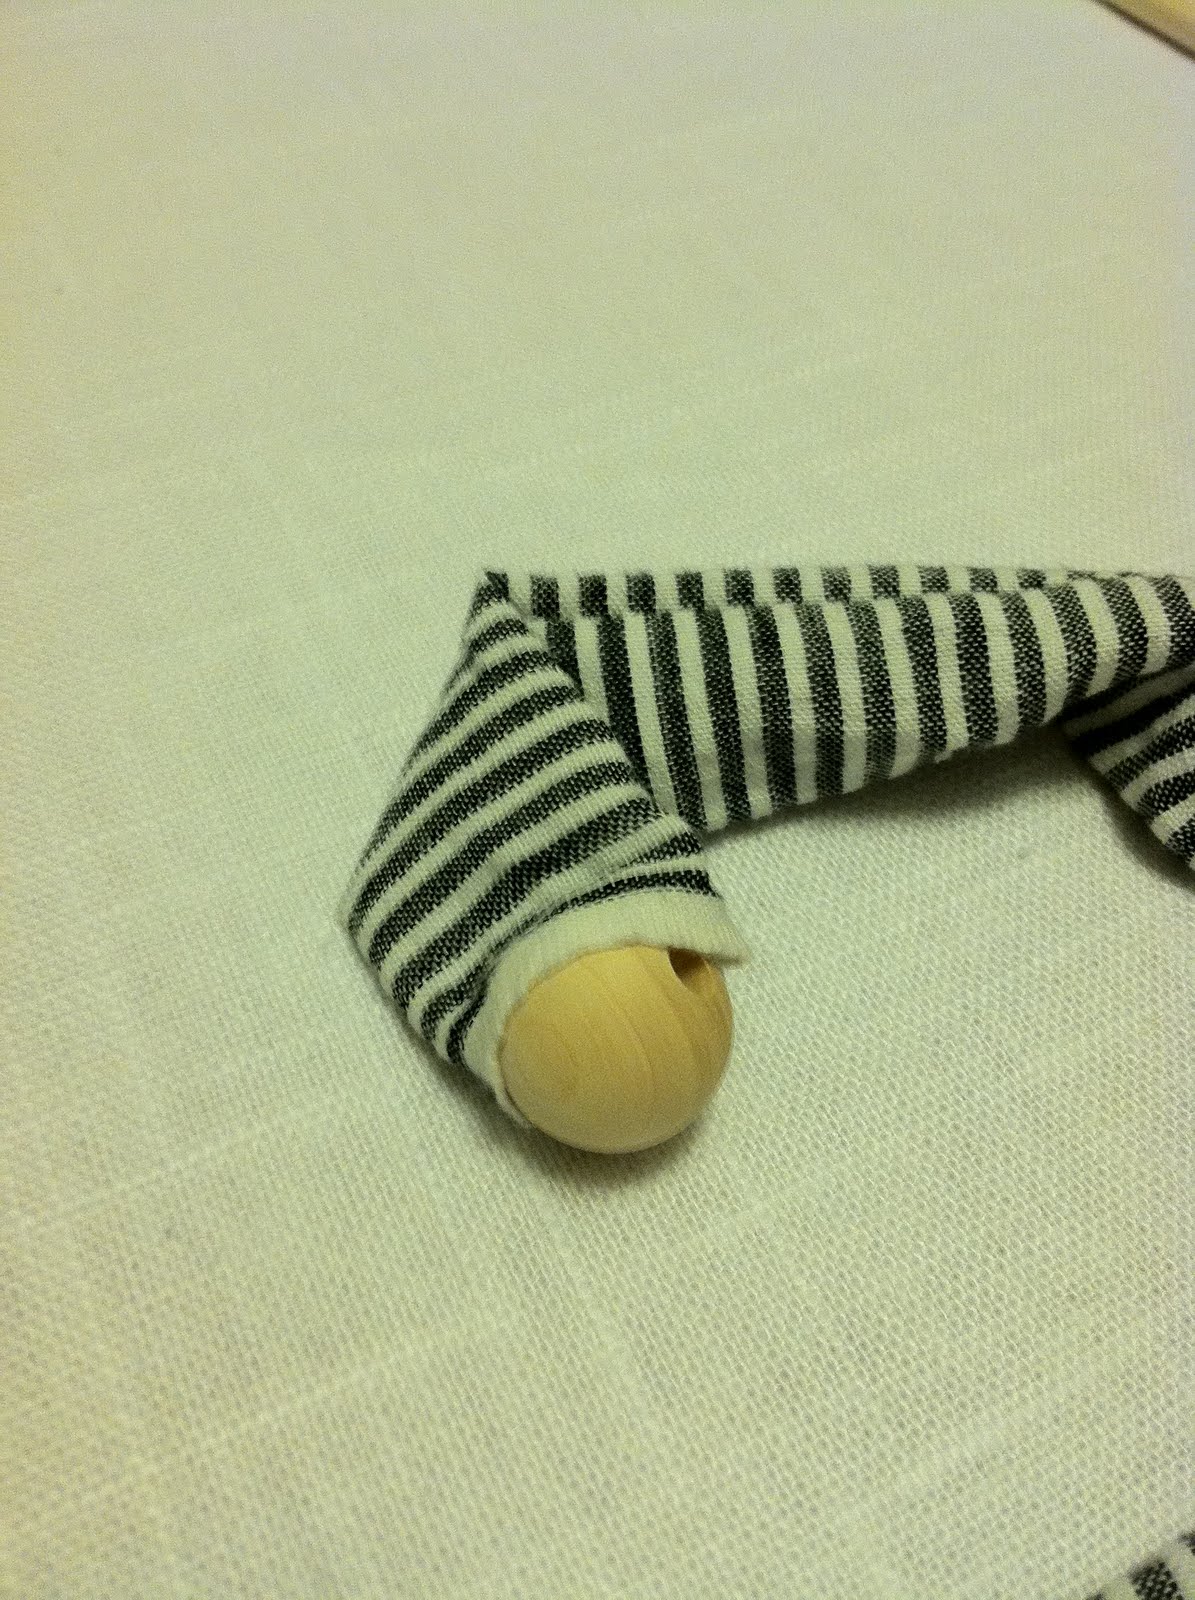
Once the fabric is turned the right way, knot one of the ends--leaving about 3-4 inches of fabric.


Then drop a craft ball in.


Next, tie a knot on the other side of the ball.


Repeat until you run out of space (you have about 3-4 inches left of fabric). Knot the end.


I didn't have enough fabric to just tie the ends so I sewed a small piece of Velcro to the ends to hold it together.


Instant cute necklace! Takes all of 10-15 mins.


Loves,

Kiera

Thursday, June 9, 2011

recycling broken crayons

Recycled Crayons


Have you all seen the books that Family Fun puts out? If you sign up for a two year magazine subscription they send you books about crafts, party ideas, cakes, etc. They are awesome! Anyways, I got the idea for recycling broken crayons from their book.


My son has a tendency to break crayons while he's coloring. He's just very intense:) So, rather than throw the broken pieces away I save them and then recycle them.

Supplies needed: aluminum foil, borken crayons, and some cookie cutters OR tuna can tins.
First, wrap the bottom of the cookie cutters with aluminum foil.

Tip: If you are using tuna can tins then you don't need aluminum foil. You can just put the crayons right in the can.
Here they are wrapped.


Next, unwrap the crayons from the paper.


Then put the crayons into the molds. Fill about 1/2 full.

Put the molds into the oven at 300 degrees for 5-7mins.


Tip: watch the crayons. They melt fast. You don't want them you melt completely into one color!

When you're done, let them cool in the molds for about 30 minutes.


When they are cooled--pop them out of the moldings. Be patient or they will break apart--like mine did. oops!


Tip: The side that face the aluminum foil will be more colorful.

Color away!

Loves,

Kiera

Thursday, June 2, 2011

Choose your own adventure

I don't know if this constitues a craft, but it was a fun activity for our family. It's also a great way to mark some "chores" off the eternal list while making it seem fun :) (good Mommy trick).


"Choose your own Adventure"


Rules:


30 activities split into a blue group and a purple group


Had to at least start the activity within 2 hours of picking it


The card will tell the picker what color to choose next.


One week to complete all of the activities.


Here are a sampling of possible activities:


Play tennis
Homemade pizzas
Hang out with friends
Register at Baby's R Us (we are pregnant as the time)


Go to the Dollar Store and buy silly gifts for each other (limit was $5 each)
Chores around the house
Rearrangeguest room
Make two Halloween crafts
Make Halloween suckers for friends
See a movie AT THE MOVIE THEATER


Go to Godwill and buy silly stuff (limit was $10 each)
Go eat a sweet treat


Get the oil changed in both cars and get them washed
TAke a drive as a family (no particular destination required)
Listen to a lecture on campus (we were in college at the time)
Buy two cute baby outfits for our little guy
Do Family History Indexing
Go to the Public Library and check out a couple of books
Read for fun for a couple hours--no school books allowed
Catch up on School Stuff
Rearrange/Clean craft room
Buy a fish
Take a hike
Going swimming
Have a Mexican Food Night
Go bowling
Make Carmel Apples
Going to the Drive-In
"You Pick" activity--come up with an activity on the spot


Make a craft


Loves,


Kiera

Wednesday, June 1, 2011

Homemade Bows

Homemade Bows


Supplies Needed: Any type of material you want (I found that the stiffer materials hold up better--burlap being the best), scissors, and a stapler.
Take your material and cut 9 strips between 6-8 inches long and 1- 1 1/2 inches wide (depending on the size of bow you want to crate).
My bows started out with material 6 inches long and 1 inch wide.

Take your first piece and cross the ends over one another. Make the loop as large or small as you like. Staple the ends to gether and cut off any left over material.


(sorry I didn't have a stapler available when I took these pictures so they aren't cut correctly). Do the same wit hthe next strip of material. Then staple the two pieces together.


Continue around until you have 5 large loops. Staple them all together. Then go to the next row making 3 smaller loops to fit inside.


Take your last strip of material and make a circle. Staple the ends together and cut off the excess.


Add it to the center and staple it to the rest of the bow.


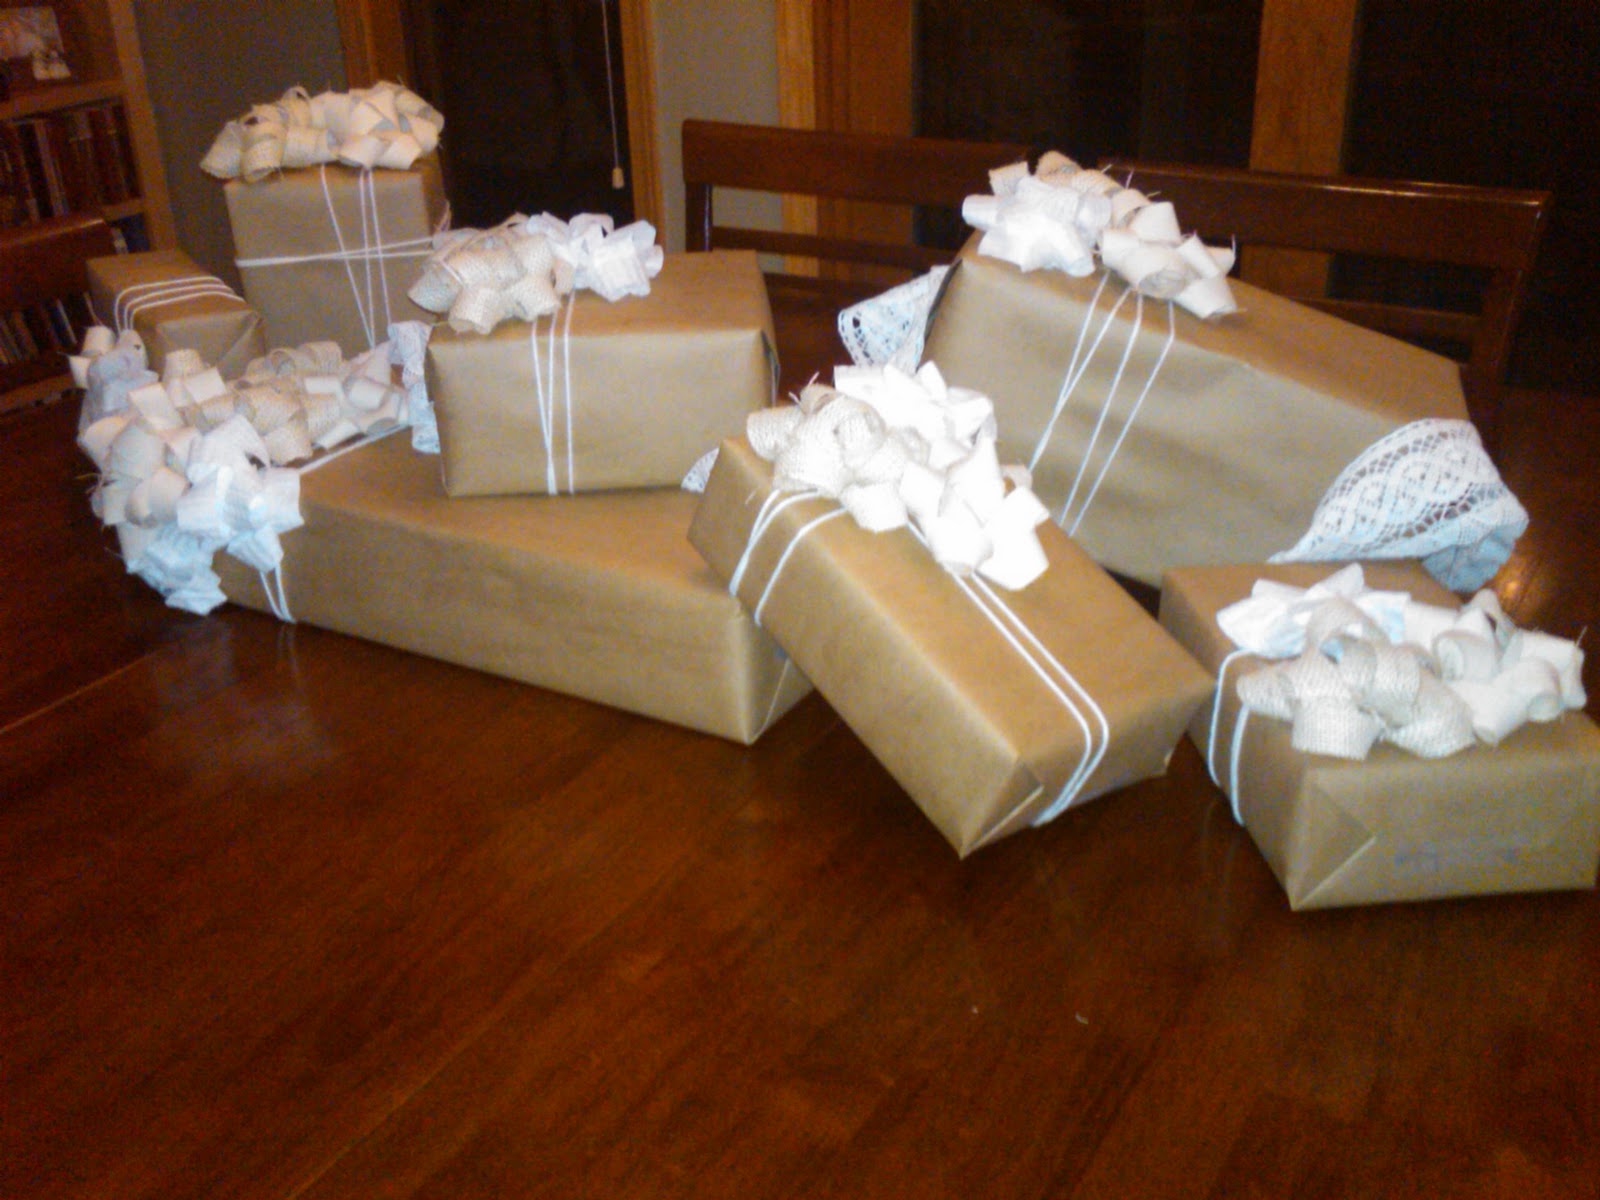
Voila! Super simple, right? I then wrapped a bunch of boxes with brown paper and used white yarn to finish off the presents.


I used these presents as a centerpiece of a Holiday Party I hosted.


Loves,


Kiera


PS-I got the color scheme and inspiration from here, but mine are nowhere near as intricate as hers. I also improvised on the sizes and how to put the bows together. You'll probably do the same. Enjoy!

Tuesday, May 31, 2011

Silk Tie Dyed Easter Eggs

Silk Tie Dyed Easter Eggs


These beauties are SUPER easy to make!!! It'll make dyeing Easter Eggs with your family so much more fun! Supplies Needed: 100% Silk Ties (I bought a bunch at Goodwill for $2 a piece), scissors, rubber bands or twisty ties, any type of white scrap material, RAW eggs, vinegar, water, and a pot.

The ties HAVE to be 100% silk or it won't work! I did notice that a couple of the ties I used said they were 100% silk, but nothing transferred to the eggs so obviously they weren't telling the truth.

First things first, rip apart the ties. Take out all of the lining and remove any loose strings.

Depending on the size of the tie you'll be able to cover 2-4 eggs. Cut just enough material from the tie to be able to completely wrap around the egg.

Wrap the egg with the print side TOWARDS the egg.

Be careful when wrapping the egg since they are RAW and could crack.


Secure the material with a rubber band or twisty tie.


TIP: Try to wrap the egg so there are as FEW creases as possible...The creases will show up (I'll show you what I mean at the end of the post).


Then take your white scrap material (I cut up an old pillow case) and cover the egg again. Secure with another rubber band.

The white material keeps the colors from the various ties from bleeding when you boil them all together.


Once all the eggs are wrapped in both the tie material and the white scrap material you are ready to cook them.


Take a large pot of water and add at least 1/4 cup vinegar--more may be needed depending on the size of the pot.


Add all of the covered eggs to the pot of water and turn on the heat. Bring water to a boil. Boil for 25 minutes.


When they are done cooking, remove them from the water, but leave them WRAPPED! Allow them to cool and dry on a towel while they are still wrapped. (I would say at least an hour and then you can transfer them to the fridge to continue cooling and drying if you plan to eat the eggs later).


Unwrap and enjoy!!!


As I mentioned before, if there are a lot of creases in your material when you wrap the egg, they will show up on the finished product (note the white streaks on the eggs). It is inevitable to have some, so try to pull the fabric so the creases are all on one side of the egg.


Loves,
Kiera


PS-I would love to give credit to the originator of this idea, but I couldn't pinpoint the 1st person. Sorry!

simple crafts

My son is 2. Nothing keeps him entertained for long. I have found that crafts are a great idea as long as they are short and sweet and to the point. Here are a few toddler crafts that will take up a good chunk of time and they have something to show off when they are done.


Rice shaker: old paper towel tube, rice wax paper to cover the end. Some tape, and a 12x12 piece of white paper the kids can draw on.


Wrap one end with double thick wax paper. Tape it to the tube. Pour in some rice or popcorn kernels, secure the other end with wax paper and tape. Wrap the tube in the 12/x12 piece of paper that the kiddos decorated and tape it on. Shake away.
Painting: Go to JoAnns, buy a small wooden birdhouse for $1.29. Buy some water-based Acrylic paint. Paint away, kid...paint away.


The dunce cap (or party hat): piece of 12x12 paper, stapler or tape, and crayons. Let the kids color the paper. Wrap it into a cone. Cut and staple (or tape) as needed.


My son LOVES wearing this silly hat.


The best part of all of these crafts is they are geared for the little ones. They take miminal planning and minimal mess (my favorite part). Plus, the kids LOVE that they have created something.